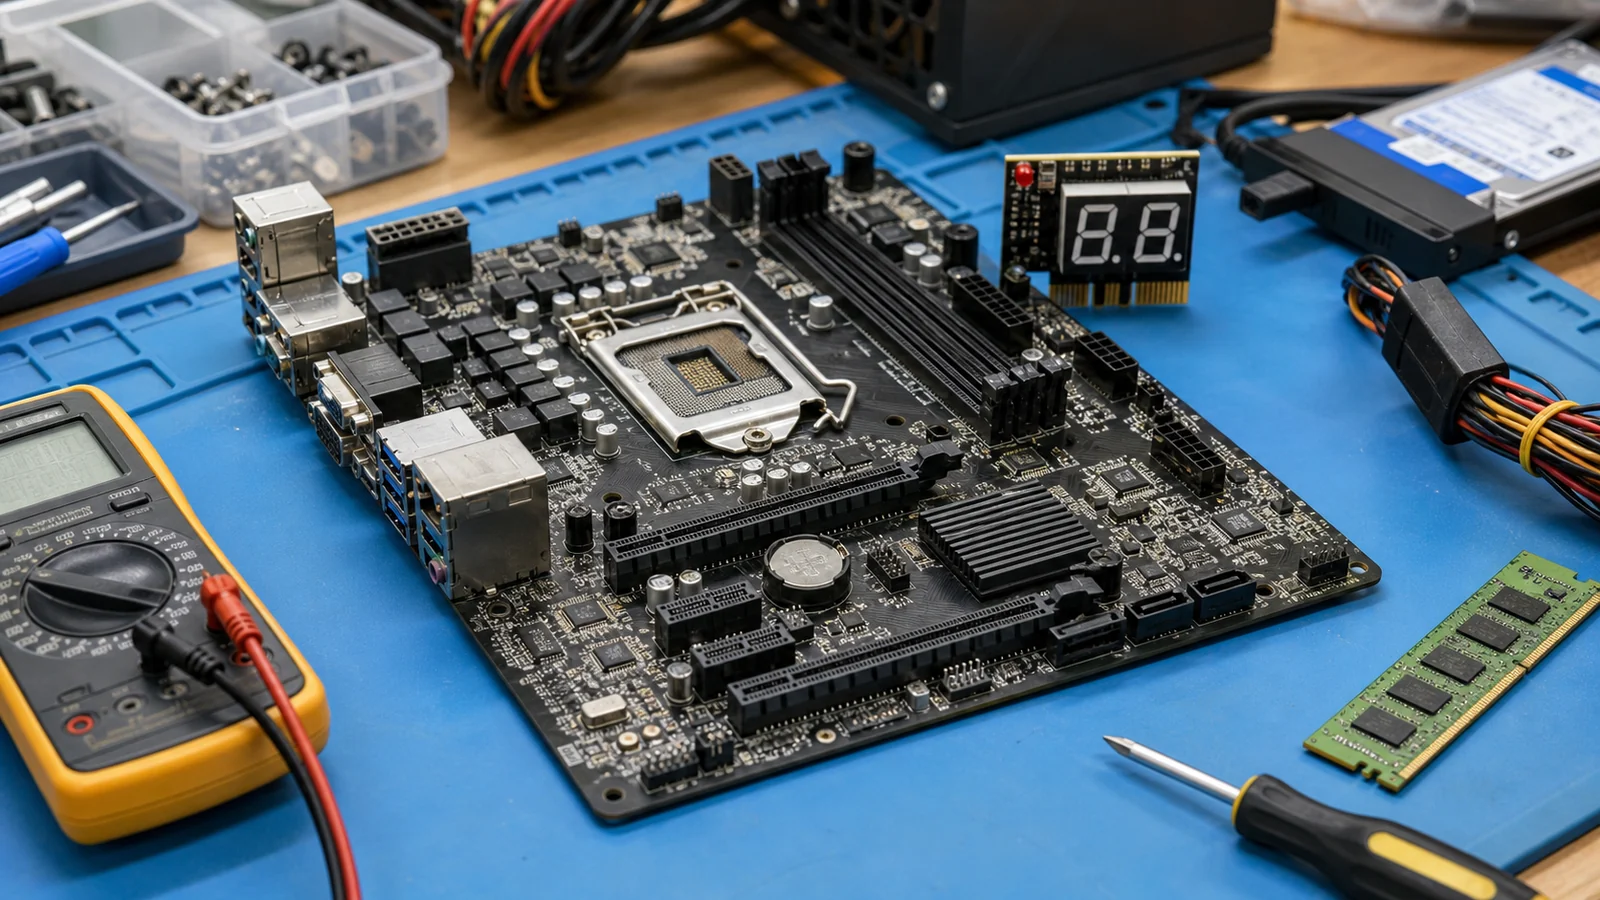
“I think my motherboard died, I’ve got everything on there.” This call to the repair shop comes in regularly, and it always mixes two fears together: my computer died and I lost my data. I’ve got two pieces of good news right off the bat.
First: the motherboard is the most commonly accused but rarely the actual culprit. iFixit sums it up bluntly after years of repairs — “about 19 out of 20 motherboards returned as defective are actually perfectly fine”. Most of the time, it’s the power supply, improperly seated memory, or an assembly error. So we don’t treat the motherboard like a death sentence; instead, we go through an elimination chain.
Second, and this is more important: even if the motherboard really is dead, your data doesn’t disappear. The drive survives the motherboard’s death — you just move it elsewhere. Unlike a dying drive, you’re not racing against time and your photos here.
Let’s break it down the way I go through it with a customer in the workshop: based on what the computer is doing.
Before you take anything apart: if the PC occasionally turns on, copy your important data off it first. And if it’s under warranty, don’t open it — file a warranty claim.
How a motherboard “dies”: let’s sort it by what the computer does
Diagnostics branch out based on how far the computer gets. Here’s the whole tree in a nutshell.
Nothing happens — no power
You press the button and it’s dead: no fan, no LED. Before blaming the motherboard, start with the outlet, cable, and power supply. iFixit puts it bluntly: the most likely cause of a “dead” system is a blown fuse or tripped breaker in the outlet, not the motherboard. Only with a known-good power supply and after ruling out a short does it make sense to suspect the motherboard’s power circuitry.
It powers on, but no display (fails POST)
Fans spin, LEDs light up — but the screen stays black and the computer fails to pass POST (the initial self-test). This is classic territory for beep codes and diagnostic LEDs (more on those shortly) and for a minimal setup. The most common culprits here are improperly seated or faulty RAM, graphics, a misaligned processor, or a dead coin-cell battery. Note: “fans spinning” doesn’t mean “the motherboard is fine” — fans will spin even with a completely dead processor; it’s just a sign that the power supply is delivering voltage.
It boots, but crashes or is unstable
Blue screens, random restarts, freezing under load. If the computer gets into the OS, it usually passed basic hardware testing — and the motherboard is a less likely culprit here than RAM, the power supply, overheating, or the drive. We suspect the motherboard more when specific ports fail (USB, network, audio), when you can see bulging capacitors on it, or when the problem persists even after swapping memory, power supply, and drive.
Sometimes it works, sometimes it doesn’t
The hardest to track down. A fault that disappears and returns with temperature or position (crashes after warming up, works in the morning) points to a physical problem with the board or connections — cold solder joints, micro-cracks, a capacitor on the edge — more often than software. Only patient observation and elimination helps here.
“Is it really the motherboard?” How we rule it out in the workshop
The core of the whole diagnosis: we don’t label the motherboard as faulty until we’ve ruled out everything else. Remember those 19 out of 20.
- Rule out the power supply first. iFixit and our own experience agree: the first step is to swap in a known-good power supply. A quick orientation test without the board is the “paperclip” — bridging the PS_ON pin (green wire) to any ground (black wire) on the 24-pin ATX connector will start the power supply and spin its fan. But mind the context: this test only shows that the power supply turns on, not that it delivers correct and stable voltages. A proper power supply test requires a tester or a load.
- RAM: take it out and firmly reseat it; with two or more modules, try booting with one and rotating slots — this reveals a faulty module or a faulty slot. Hold the module by the edges, touch bare metal first (static).
- Minimal setup: disconnect everything unnecessary (drives, add-in cards, peripherals) and leave only the processor, one memory module, graphics, and power. If the bare setup boots, the culprit is something you disconnected — add things back one at a time.
- Graphics and processor: try integrated graphics or a different card; for the processor, check the socket pins (Intel) or processor pins (older AMD) — see below.
- Clear CMOS: removing the coin-cell battery or bridging the CLR_CMOS jumper resets the BIOS to factory defaults. Fixes “won’t boot after a bad setting or a part swap”.
When even after all this the computer shows no signs of life with a known-good power supply and one verified stick of RAM, only then does the motherboard become the prime suspect.
Beeping (beep codes): it’s a message, not a fault
When the firmware can’t even get to a display, it reports the fault through the number and rhythm of beeps. But one thing is crucial and saves a lot of confusion: there is no universal beep code table — the meaning depends on the BIOS and motherboard manufacturer. The notation 1-3-2 means one beep, pause, three beeps, pause, two beeps. Instead of copying one “table for everything,” it’s always correct to find your manufacturer’s reference:
| BIOS / Manufacturer | What it typically reports | Where to look |
|---|---|---|
| AMI | 1 long + 3 short = system memory, 8 = video memory | AMIBIOS reference |
| Award / Phoenix | typically 1 long + 2 short = graphics; otherwise varies by version | POST beep codes |
| Dell (desktop) | 5 = RTC / CMOS battery, 1 = BIOS ROM, 2 = RAM, 6 = video | Dell beep codes |
| Lenovo / HP | own scheme, newer ones also report via blinking LEDs | manual for the specific model |
A useful detail: on Dells, beep 5 = coin-cell battery — which is the cheapest possible “motherboard problem” (more on that shortly). And watch out for the era: Dell from the OptiPlex generation around 2012 mostly eliminated beep codes, leaving a single memory pattern 1-3-2, otherwise using power button LED blinking.
Diagnostic LEDs and POST codes: the fastest way on a modern board
Modern boards have largely replaced beeping with diagnostic LEDs, and they’re easier for a layperson to read. The principle is the same across brands (ASUS Q-LED, MSI EZ Debug LED, Gigabyte): during startup, the board tests components in sequence and lights up the LED for the stage where it got stuck. A brief flash during startup is normal — a steadily lit LED indicates a problem.
| LED lit | What it means | First step |
|---|---|---|
| CPU | processor not found or faulty | reseat, check socket pins |
| DRAM | memory not found or faulty | boot with one module, rotate slots |
| VGA | graphics not found or faulty | reseat card / try a different slot or integrated |
| BOOT | boot device not found (drive) | check drive and cables |
Meanings according to the official ASUS FAQ on Q-LED indicators; the same four-stage CPU–DRAM–VGA–BOOT logic applies to MSI and Gigabyte.
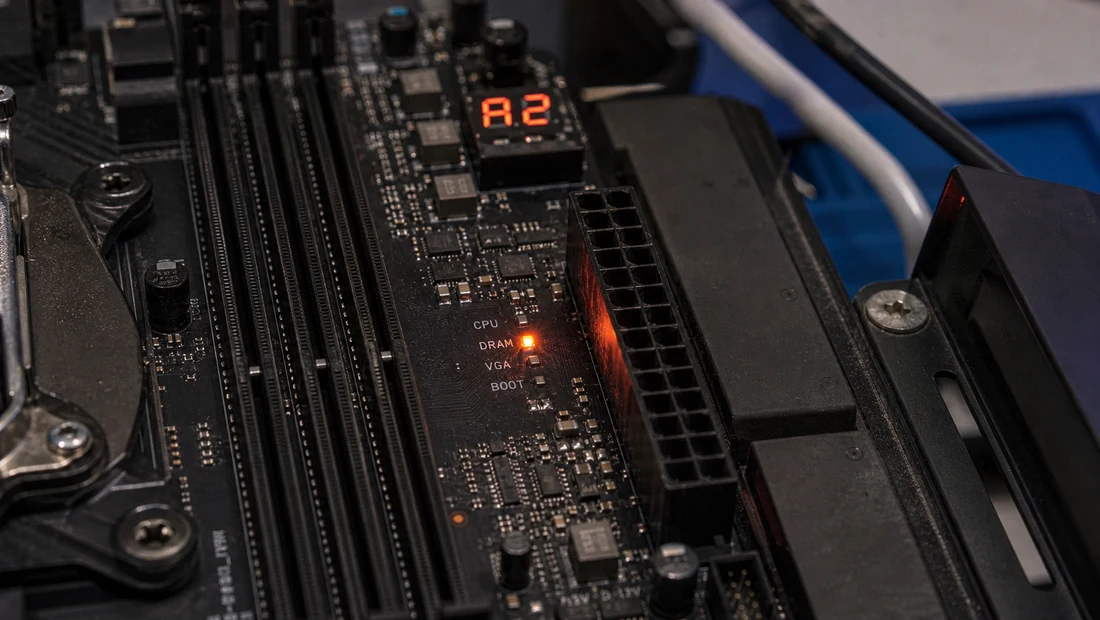
Illustrative photo. Diagnostic LEDs (or a two-digit Q-Code display on pricier boards) tell you in a second where the startup is stuck — here it’s DRAM. A repair shop can also read them using a POST card on a board that lacks its own display.
Pricier boards also have a two-digit display (Q-Code) showing a hexadecimal POST stage code; its meaning is found in the specific board’s manual. In the workshop, we use a plug-in POST diagnostic card for the same purpose.
What you can see at a glance: physical symptoms
Sometimes it’s enough to thoroughly inspect the board under good light.
Bulging or leaking capacitors. This is the most obvious symptom. An electrolytic capacitor should have a flat top; when it bulges into a dome, pushes out the rubber plug from the bottom, or you find a dried brownish crust around the base, it’s done — and it causes instability, random shutdowns, or failure to boot. The term “capacitor plague” even has its own history: due to a faulty electrolyte formula between 1999 and 2007, capacitors failed en masse across brands — Dell alone spent around $420 million on motherboard replacements back then. But let’s be fair: today’s boards mainly use solid polymer capacitors, and that specific plague is history. Bulging from age and heat still happens on cheaper or older units, though — especially around the CPU power delivery area.
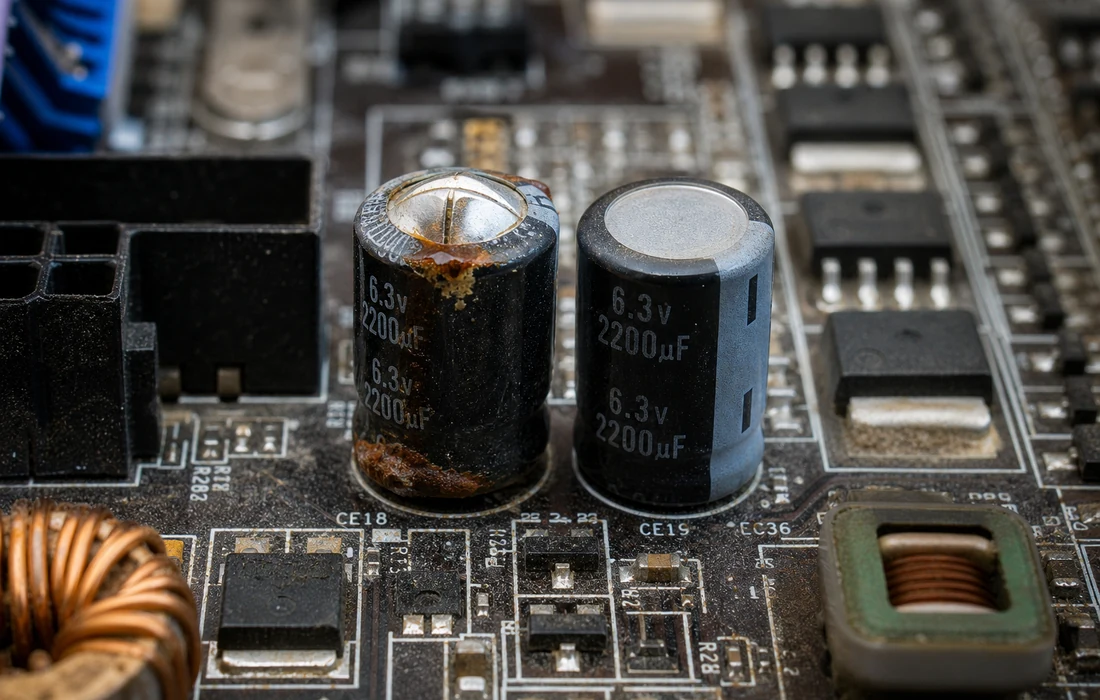
Illustrative photo. A bulging capacitor (left) next to a healthy one (right): the top bulges into a dome instead of a flat surface with a “+” groove. On older boards, it can be replaced by soldering; whether it’s worth it depends on the price of a new board.
Burn marks and corrosion. Dark traces, melted connector plastic, or a burnt smell (typically around the CPU power delivery) usually mean it’s a write-off. Liquid damage (spilled drink, moisture) leaves greenish or white corrosion on contacts — sometimes it can be cleaned, but often it permanently damages the board.
Bent socket pins. On Intel (LGA), the fragile pins are in the socket on the board; on older AMD (up to AM4), they’re on the processor. A bent pin causes the processor not to be detected or a non-functional memory channel. They can be carefully straightened, but it’s delicate, precise work — “one extra bend and the pin snaps off,” and a broken pin is practically unrepairable.
Before you write off the board: try a coin-cell battery for pennies
There’s a CR2032 coin-cell battery on the board that powers the clock and settings memory when the computer is off. When it dies after a few years, it manifests in ways that look worse than they are:
- after every shutdown, the clock and date reset (jumping to, say, 2009),
- BIOS settings are lost (boot order, profiles),
- at startup, you get a “CMOS checksum error” or “Press F1 to continue” message.
Important: a dead battery usually doesn’t prevent the PC from turning on at all — it’s more about these resets. Yet people and even repair shops sometimes mistake it for a “dead motherboard.” When it’s actually the cheapest possible fix (a battery costing pennies) and replacement is trivial. It lasts roughly 3 to 10 years.
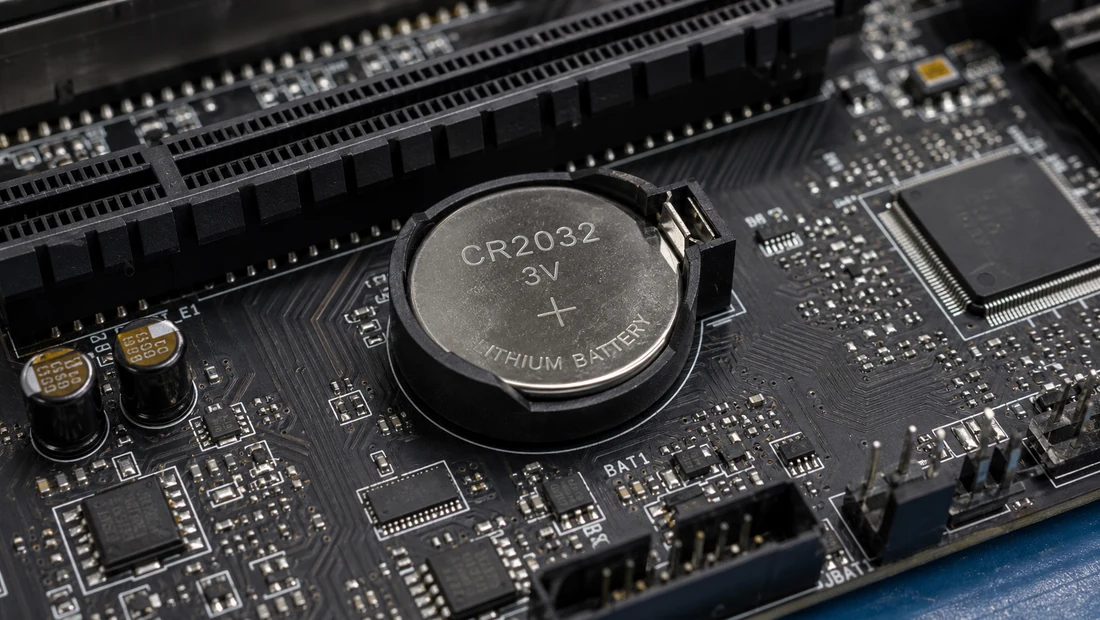
Illustrative photo. The CR2032 coin-cell battery: the most common “false alarm” that looks like a faulty motherboard. Before writing off the board, replace it — it costs pennies.
Won’t boot after a BIOS update? It might not be dead
When a BIOS update gets interrupted (power outage, shutdown during flash), the board’s “brain” is left with corrupted content and the computer fails POST. It’s not necessarily a dead board — just broken firmware. Many boards account for this:
- Dual-BIOS (Gigabyte) — the backup chip takes over and restores the main one.
- BIOS Flashback / Q-Flash Plus / CrashFree — the board reads a BIOS file from a USB drive and rewrites the chip. On boards with this feature, the firmware can be reflashed, often even without a fully installed processor and memory — follow the exact procedure in the specific board’s manual.
Repair or replace? (and when the board drags the processor and memory with it)
Honestly, without myths. Realistically worth considering: replacing the coin-cell battery, resoldering bulging capacitors on an older board, reflashing the BIOS, carefully straightening pins. Likely or completely a write-off: burnt power delivery, damaged chipset, broken traces on the board, short circuit from liquid.
One claim from the internet needs to be set straight. “Reflowing” a chip — heating up the graphics or chipset in an oven or with hot air — is not a permanent fix. From repair practice, a chip “revived” this way usually fails again within weeks to months, because heat doesn’t address the cause, it just temporarily aligns it. Consider it at most an emergency revival to get your data out — not a solution.
And finally, a reality people often overlook: a new motherboard rarely means just the board. The socket and memory generation can force you to replace the processor and RAM too:
- AMD AM5 supports only DDR5, not DDR4, and an AM4 processor won’t fit AM5.
- Intel moved from LGA1700 to the incompatible LGA1851 — different socket, different processor.
- DDR5 won’t fit in a DDR4 slot (and vice versa) — they have a physically different key.
So on an older computer, “just replacing the board” easily turns into replacing the trio of board + processor + memory, with a cost close to a new machine. Whether to go down that road is something we also discuss in the article when to repair, reinstall, or toss a computer.
The best news: a dead motherboard doesn’t mean lost data
This is the whole core of it and the main difference from a faulty drive. When a motherboard dies, the drive survives it just fine — the board doesn’t write anything destructive to it as it dies. You can get your data out simply:
- move the drive to another computer, or
- connect it via a SATA-USB adapter / docking station and copy the files.
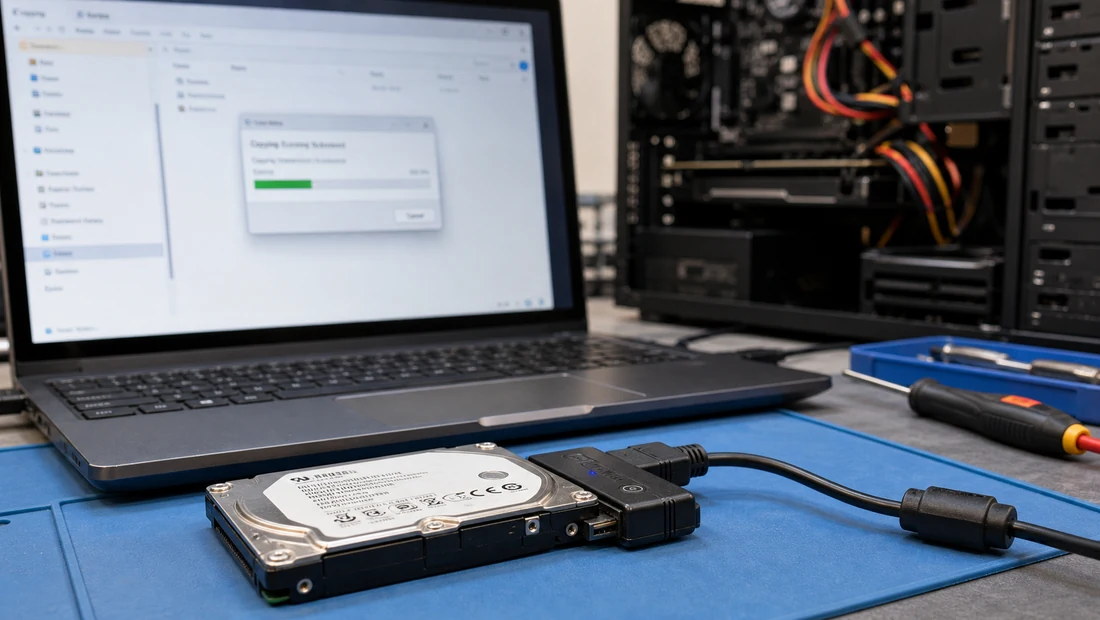
Illustrative photo. A drive from a PC with a dead motherboard connected via a SATA-USB adapter: data is out in minutes. The board is “just” hardware — the drive and your files survive it.
Two exceptions, to be fair: if the drive was encrypted with BitLocker, you’ll need the recovery key on another computer. And if the drive is acting up alongside the board, the caution from the article on bad sectors applies. Otherwise, the rule holds: unlike a dying drive, you’re not losing data here.
What you can handle at home and when to call a repair shop
At home, you can comfortably handle: checking the outlet, cable, and power supply; reseating RAM and booting a minimal setup; reading debug LEDs or looking up your manufacturer’s beep code; inspecting the board for bulging capacitors; and replacing the coin-cell battery. That covers most of those “19 out of 20” cases where it wasn’t actually a faulty board after all.
It’s time for a repair shop when: the board has burn marks, liquid damage, or bulging capacitors; the computer shows no signs of life even with a known-good power supply and verified memory; or you simply don’t want to risk it and want certainty. At our PC repair shop in Brno, we’ll diagnose the board, tell you straight whether a repair is worth it or a replacement makes more sense — and most importantly, we’ll get your data off the drive, no matter how the board turns out. The same diagnostics for laptops is covered in laptop won’t turn on.
In summary: before you write off the motherboard, rule out the power supply and memory — nineteen out of twenty “dead” boards are actually fine. And even if yours really is dead, your data on the drive survives it. That’s the best news in this whole unpleasant situation. And as always: back up before you need it.
Rather not deal with it yourself?
Book a diagnosis in Brno — you get the price up front and we start only once you agree.
Where to find us
We are a PC and laptop repair shop in Brno-Židenice: diagnostics and repairs of computers and laptops, data recovery from drives, and out-of-warranty Apple repairs (iPhone 12 and newer, MacBook, iPad).
Viniční 3587/216, 615 00 Brno-Židenice, Czech Republic Mon–Fri 10:00–16:00
Call +420 774 777 774 Computer repair and laptop service in Brno
We put the repair price in writing after diagnostics and carry on only once you agree.