The short answer: On ThinkPad T-series models (T480, T14 Gen 1 through Gen 5, P14s), the L14 Gen 1, and the X13, the keyboard is a separate part that comes out from the top: loosen the screws, slide the keyboard toward the display to release the frame latches, fold it onto the palm rest, and disconnect the cables. On the X1 Carbon (verified for generations 6, 7, and 10 through 13), X1 Nano, T14s, and E series, the keyboard is integrated into the top cover. Lenovo manuals call this part the “Keyboard bezel assembly with keyboard” or “Keyboard assembly,” and it appears at the very end of the procedure, after the battery, motherboard, and display. The same fault can therefore mean replacing a part held by a few screws on one model, but completely dismantling the machine and installing a more expensive assembly on another. Before ordering a part, photograph the machine type on the bottom label and have the correct FRU identified from the serial number.
Why the Same Repair Differs Between Two ThinkPads
Lenovo divides parts into three categories, with a table for each in every Hardware Maintenance Manual (HMM): a self-service CRU can be replaced by the customer, an optional-service CRU can be handled by a skilled customer or a repair shop, and an FRU should be replaced only by a trained technician, with DIY replacement potentially affecting the warranty. The T14 Gen 3 keyboard is classified as a self-service CRU. On the X1 Carbon Gen 11, the keyboard does not appear in the table as a separate item at all; only the “Keyboard bezel assembly with keyboard” is listed, with “No” in both columns.
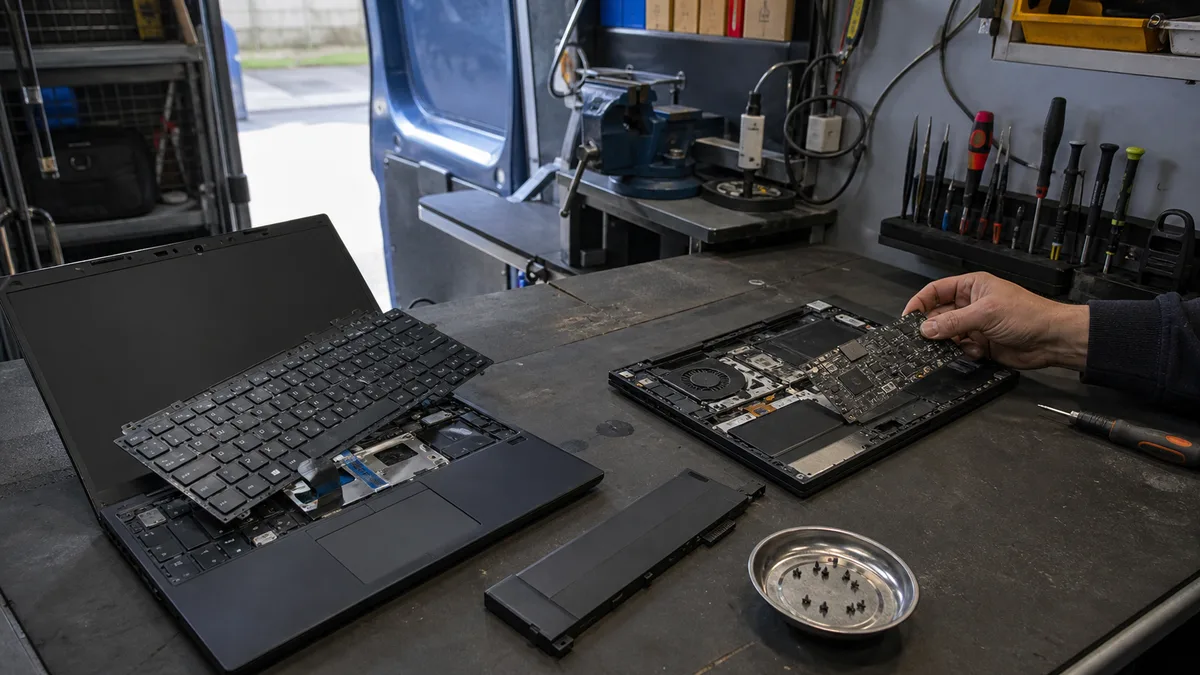
The difference lies in the construction. On the T series, the keyboard sits in a frame (keyboard bezel), secured by latches and screws accessible from the bottom; the frame remains in place. On the X1 Carbon, the keyboard is part of the top cover, which the documentation calls the C-cover, and is replaced with it. According to the HMM, everything else must therefore be removed first. An iFixit guide shows what extracting only the keyboard from a 6th-generation X1 Carbon would involve: after removing the bottom cover, battery, SSD, fan, motherboard, and daughterboard, you must peel away the tape covering the screws and remove 72 screws measuring 0.5 mm in length; the 7th generation has 66 of them.
How the Keyboard Is Replaced on Different ThinkPads
The table is based on Lenovo manuals and, for two older X1 Carbon models, iFixit. Machine types are the four-character codes printed on the bottom label.
| Model (machine types) | How the keyboard is replaced | Part name in the manual | What to watch out for | Source |
|---|---|---|---|---|
| T480 (20L5, 20L6) | from the top: remove the removable battery, loosen two screws, turn the laptop over, open the lid, and push the keyboard toward the display | Keyboard | disable the built-in battery first | T480 HMM |
| T14 Gen 1 / P14s Gen 1 (20S0, 20S1, 20S2, 20S3, 20UD, 20UE), T14 Gen 2 / P14s Gen 2 (20W0, 20W1, 20XK, 20XL) | from the top; “1010 Keyboard” is the first chapter in the HMM, before the bottom cover; Lenovo provides a Customer Self Service video | Keyboard (optional-service CRU) | the replacement part comes with a special pry tool; without it, use a plastic tool | T14 Gen 1 and Gen 2 HMMs |
| T14 Gen 3 / P14s Gen 3 (21AH, 21AJ, 21CF, 21CG), T14 Gen 4 / P14s Gen 4 (21HD, 21HE, 21K3, 21K4) | from the top: loosen two captive screws, slide upward, lift, and disconnect two cables | Keyboard (self-service CRU) | do not press the keys while sliding the frame | T14 Gen 3 and Gen 4 HMMs; iFixit |
| T14 Gen 5 / P14s Gen 5 / T16 Gen 3 | from the top: loosen the screws, slide in the direction of the arrows, fold onto the palm rest, and disconnect the connectors | Keyboard (“Replace a CRU” chapter) | disable the battery in UEFI first | T14 Gen 5 User Guide |
| L14 Gen 1 / L15 Gen 1 (20U1, 20U2, 20U5, 20U6 / 20U3, 20U4, 20U7, 20U8) | from the top; “1010 Keyboard” appears before the bottom cover | Keyboard (optional-service CRU) | the same warning about the frame applies | L14 Gen 1 HMM |
| X13 Gen 1 (20T2, 20T3, 20UF, 20UG), X13 Gen 3 (21BN, 21BQ, 21CM, 21CN) | from the top; in the manual shared with the T14s, the procedure is marked “for ThinkPad X13 only” | Keyboard (Gen 1 optional-service CRU, Gen 3 self-service CRU) | the X13 and T14s share a manual, but not the same construction | T14s/X13 Gen 1 and Gen 3 HMMs |
| T14s Gen 1 (20T0, 20T1, 20UH, 20UJ), T14s Gen 3 (21BR, 21BS, 21CQ, 21CR), T14s Gen 4 (21F6, 21F7, 21F8, 21F9) | only after dismantling the entire machine, including the motherboard and display | Keyboard assembly (FRU) | the T14s is not simply a “thinner T14” | T14s Gen 1, 3, and 4 HMMs |
| X1 Carbon 6th and 7th generations | only after dismantling the machine; the keyboard is held in the cover by 72 and 66 screws respectively, each 0.5 mm long, plus tape | Keyboard (iFixit guide) | tiny screws and fragile cables | iFixit |
| X1 Carbon Gen 10, Gen 11 (21HM, 21HN), Gen 12 (21KC, 21KD), Gen 13 (21NS, 21NT) | only after dismantling the entire machine, including the motherboard and LCD | Keyboard bezel assembly with keyboard (Gen 10, 11), Keyboard assembly (Gen 12, 13) | for the 30th Anniversary Edition (Gen 10), Lenovo replaces the cover only with the standard version | X1 Carbon Gen 10 through 13 HMMs |
| X1 Nano Gen 2 (21E8, 21E9) | only after dismantling the machine, including the motherboard and LCD | Keyboard bezel assembly with keyboard; listed in the CRU table as “C cover with keyboard assembly” | classified as a complete C-cover | X1 Nano Gen 2 HMM |
| E14 Gen 2 / E15 Gen 2 (20TA, 20TB, 20T6, 20T7 / 20TD, 20TE, 20T8, 20T9) | only after dismantling the entire machine; the HMM requires removing the LCD and motherboard first | Keyboard assembly (FRU) | for the E14 Gen 4, iFixit also describes a metal plate beneath the keyboard | E14 Gen 2 HMM; iFixit E14 Gen 4 |
| E14 Gen 5 / E16 Gen 1 (21JK, 21JL, 21JR, 21JS / 21JN, 21JQ, 21JT, 21JU) | the keyboard has no separate procedure in the HMM; the “Keyboard assembly” is what remains after every other part has been removed | Keyboard assembly (FRU) | the less expensive E series is more labor-intensive to repair than the T series | E14 Gen 5 HMM |
For a model not included in the table, a simple rule applies: open the “Removing or replacing a FRU” chapter in the HMM. If the keyboard appears as item 1010 before the bottom cover, it can be replaced from the top. If you see “Keyboard bezel assembly with keyboard” or “Keyboard assembly” followed by a list of everything that must be removed first, the entire machine must be dismantled.
What an FRU Number Is and Why “Keyboard for T14” Is Not Enough
FRU refers both to a replacement part and its identifying number. The T14 Gen 1 manual explains how to find it: enter the machine type at support.lenovo.com/partslookup to receive a general parts list, or enter the serial number to obtain the exact list for your particular machine. This distinction matters for keyboards. The same generation is manufactured with different layouts (Czech, Slovak, US, German) and often with or without backlighting. Lenovo PSREF lists both variants for the T14 Gen 1, while the X1 Carbon Gen 11 is available only with a backlit keyboard. Each combination has its own number, even though the parts may look identical in listing photos. According to the manuals, the keyboard is also supplied with its cables, including the TrackPoint cable, so a new keyboard without the correct cables is only half a replacement part.
After replacement, the language must also be configured in UEFI BIOS under Config, Keyboard/Mouse, Keyboard Layout; the manuals include this as part of the installation procedure. If UEFI is protected by a supervisor password, you will need it.
What to Check Before Ordering a Part
- Photograph the label on the bottom. You need the machine type (four characters) and the S/N serial number; according to the T14 Gen 3 manual, the S/N label is one of the markings on the bottom cover.
- Have the FRU identified from the serial number, not merely the machine type, and compare the layout (CZ/SK/US) and backlighting with the keyboard currently installed in the laptop.
- Open the HMM for your generation (support.lenovo.com, Documentation, Hardware Maintenance Manual). Newer machines also have a user guide containing a “Replace a CRU” chapter and Removal and Replacement videos.
- Consider the symptoms, not just the keyboard. After a spill, replacing the keyboard is not enough because liquid continues down to the motherboard; the first steps are described in liquid spilled on a laptop: what to do immediately. To distinguish a software issue, connector problem, dead row of keys, and mechanically failed keys, see laptop keyboard not working or typing the wrong characters.
- For an X1 Carbon, T14s, or E-series model, get a quote for the complete assembly, not just the “keyboard”; otherwise, the unpleasant surprise will come after the part arrives.
What Not to Do
- Do not pry up the keyboard before loosening the screws, and do not press the keys while sliding the frame. Lenovo explicitly warns that the frame will not move while keys are being pressed. The more force you apply, the more likely the latches are to break.
- Do not pull ribbon cables without releasing their locks. The keyboard and TrackPoint connectors usually have hinged ZIF locks. According to iFixit, these should be lifted with the widest possible tool to avoid breaking their pins, and the cable should slide into the socket with almost no force. A broken lock turns a keyboard replacement into a motherboard repair.
- Do not work with the built-in battery enabled. On ThinkPads, it can be disabled in UEFI (press F1 during startup, then select Config, Power, Disable Built-in Battery, Yes), after which the computer should be left to cool for three to five minutes. If UEFI cannot be opened, the battery connector must be disconnected manually. Do not handle a swollen battery at home; see swollen laptop battery.
- Do not try to remove only the keyboard from an X1 Carbon cover. The manuals provide no such procedure, and the dozens of half-millimetre screws shown by iFixit explain why.
- Do not order by photo. Use the part number linked to the serial number, or you may receive a different layout or a keyboard without backlighting.
- Do not forget to configure Keyboard Layout in UEFI after replacement.
A Brief Look at Other Brands
The same distinction exists outside Lenovo. On the Dell Latitude 5440, the keyboard is a separate part secured to a support plate by four M2×2 screws, while another seventeen screws attach the plate to the palm rest. However, the official manual first requires the removal of the bottom cover, battery, memory, SSD, cards, heat sink, speakers, inner frame, and motherboard. A separate part does not necessarily mean a quick repair. For the HP Pavilion 15, the service manual states directly that the “Top cover with keyboard” is what remains after every other part has been removed. On MacBooks, the keyboard is part of the top assembly together with the battery and trackpad; see MacBook keyboard not working or typing characters twice.
When to Visit a Repair Shop and What to Bring
Any replacement in which the keyboard is integrated into the cover should be handled by a repair shop, as should every liquid-damaged machine and any case where the trackpad, ports, or charging are also malfunctioning, since this may indicate a motherboard fault. T-series keyboard replacement can also be done at home, but even then it is worth identifying the correct FRU first.
Bring the laptop with its power adapter and a photo of the bottom label, or send the photo in advance. Describe what happened and when—such as a spill, drop, or keys failing gradually—which keys do not work, and whether UEFI has a supervisor password. Bring the BitLocker recovery key or login credentials for company machines; otherwise, the replacement cannot be tested in the operating system. After a spill, do not switch the laptop on and bring it in as soon as possible.
At Servis PC Brno in Židenice, we can use the machine type to determine whether the keyboard is a top-access part or whether the laptop requires a complete teardown and top-cover assembly replacement, and explain what the repair will involve. We are not part of Lenovo’s authorised service network; we work from official HMMs and use parts selected by FRU. You can book through the online appointment form or call 774 777 774. The available services are listed on the laptop repair Brno page, with rates in the price list. Buying a used ThinkPad? See also refurbished laptop: when it is worth buying.
Frequently Asked Questions
Can you replace just one key on a ThinkPad?
On many models, the keycap and scissor mechanism can be refitted, but the switch in the membrane cannot. If a key has stopped responding, the entire module must be replaced: on the T series, it comes out from the top; on the X1 Carbon, T14s, and E series, the top cover must be replaced.
Do I need to disconnect the battery before replacement if it is built in?
Yes. Lenovo describes a procedure through UEFI (F1, Config, Power, Disable Built-in Battery, Yes) and recommends waiting three to five minutes afterward. If UEFI cannot be accessed, the battery connector must be disconnected manually.
The new keyboard types different characters. Is it faulty?
Probably not. After replacement, the language should be configured in UEFI BIOS under Config, Keyboard/Mouse, Keyboard Layout. Another possibility is that a part with a different layout was supplied because it was ordered by appearance rather than by the FRU linked to the serial number.
Where can I find the machine type and serial number?
They are on the label on the bottom. The machine type is a four-character code (20S0, 21AH, 21HM), while the serial number is marked S/N. The machine type leads you to the correct manual; the serial number provides the exact parts list.
I have an X1 Carbon. Is replacement worthwhile, or is an external keyboard enough?
It depends on the generation, the condition of the machine, and the price of the cover assembly. Because replacement requires a complete teardown, an external keyboard can be a sensible interim solution. A liquid-damaged X1 Carbon, however, cannot wait.
Sources
- Lenovo: Remove the keyboard – T14 Gen 5, P14s Gen 5, T16 Gen 3 (User Guide)
- Lenovo: Disable the built-in battery – T14 Gen 5 (User Guide)
- Lenovo HMM: T480 (PDF)
- Lenovo HMM: T14 Gen 1 / P14s Gen 1 (PDF)
- Lenovo HMM: T14 Gen 2 / P14s Gen 2 (PDF)
- Lenovo HMM: T14 Gen 3 / P14s Gen 3 (PDF)
- Lenovo HMM: T14 Gen 4 / P14s Gen 4 (PDF)
- Lenovo HMM: L14 Gen 1 / L15 Gen 1 (PDF)
- Lenovo HMM: T14s Gen 1 / X13 Gen 1 (PDF)
- Lenovo HMM: T14s Gen 3 / X13 Gen 3 (PDF)
- Lenovo HMM: T14s Gen 4 (PDF)
- Lenovo HMM: X1 Carbon Gen 10 / X1 Yoga Gen 7 (PDF)
- Lenovo HMM: X1 Carbon Gen 11 / X1 Yoga Gen 8 (PDF)
- Lenovo: ThinkPad X1 Carbon Gen 11 (21HM, 21HN) Self-Repair Guide
- Lenovo HMM: X1 Carbon Gen 12 / X1 2-in-1 Gen 9 (PDF)
- Lenovo HMM: X1 Carbon Gen 13 / X1 2-in-1 Gen 10 (PDF)
- Lenovo HMM: X1 Nano Gen 2 (PDF)
- Lenovo HMM: E14 Gen 2 / E15 Gen 2 (PDF)
- Lenovo HMM: E14 Gen 5 / E16 Gen 1 (PDF)
- Lenovo: Replacing Your Keyboard – T14 and P14s Gen 1 and 2, Customer Self Service (video)
- Lenovo PSREF: ThinkPad T14 Gen 1 (AMD), specifications (PDF)
- Lenovo PSREF: ThinkPad X1 Carbon Gen 11, specifications (PDF)
- iFixit: ThinkPad T14 Gen 3 Keyboard Replacement
- iFixit: ThinkPad X1 Carbon 6th Gen Keyboard Replacement
- iFixit: ThinkPad X1 Carbon 7th Gen Keyboard Replacement
- iFixit: ThinkPad E14 Gen 4 Keyboard Replacement
- iFixit: Recognizing and Disconnecting Cable Connectors
- Dell: Latitude 5440 Owner’s Manual – Removing the keyboard
- HP Pavilion 15 Maintenance and Service Guide – Top cover with keyboard (ManualsLib, p. 71)
Rather not deal with it yourself?
Book a diagnosis in Brno — you get the price up front and we start only once you agree.
Where to find us
We are a PC and laptop repair shop in Brno-Židenice: diagnostics and repairs of computers and laptops, data recovery from drives, and out-of-warranty Apple repairs (iPhone 12 and newer, MacBook, iPad).
Viniční 3587/216, 615 00 Brno-Židenice, Czech Republic Mon–Fri 10:00–16:00
Call +420 774 777 774 Computer repair and laptop service in Brno
We put the repair price in writing after diagnostics and carry on only once you agree.