The short answer: You can open a laptop without damaging it only if you follow instructions for the exact model designation, not a video showing the same logo on the lid. Never force the cover open — if it remains attached at one point, use the service instructions to check the screws, clips, hooks, adhesive sections, and cables again. An overlooked screw hidden beneath a rubber foot, label, or hinged badge is a common cause. Once the cover is removed, disconnecting the battery is the first electrical step. Ribbon cables are held by locks: before pulling, determine whether the lock flips up or slides out. If you encounter a swollen battery, liquid metal, or an unfamiliar connector, stop working — repairing a socket torn from the motherboard will cost more than the component that prompted you to open the laptop.
The exact model designation matters, not the logo on the lid
A laptop is not disassembled “like a Lenovo” or “like an ASUS.” It must be treated as a specific model and generation — even within one product line, the number of screws, clip locations, and presence of cables connected to the bottom cover can change from year to year.
You can find the designation on a label underneath the laptop or in the BIOS. Dell calls it a Service Tag, HP a product number, Lenovo a machine type, and Apple an A-number printed in small type on the underside. Use this information to download the service manual from the manufacturer’s website: Dell, HP, and Lenovo make theirs freely available, Microsoft publishes Service Guides for Surface devices, and Apple provides repair manuals for models included in its Self Service Repair program. Illustrated community instructions are useful only when both the model and generation match.
Laptops are also not yet covered by the European repairability rules that have applied to phones and tablets since June 2025. Their ease of disassembly therefore remains entirely up to the manufacturer, and the range is enormous: from business machines with documented access to the battery and SSD to thin models with glued components and soldered storage.
If the fault survives these checks, or the damage is mechanical, laptop repair in Brno takes over. A related step is MacBook repair in Brno.
When DIY disassembly makes sense
Replacing an accessible RAM module or M.2 SSD in a well-documented model is a reasonable DIY task. Cleaning depends on whether removing the bottom cover is enough or whether the heatsink must also come off — that is a different level of work with different risks.
| Task | Go ahead if… | Leave it alone if… |
|---|---|---|
| replacing RAM or an M.2 SSD | you know the module type and have service instructions for your model | the memory and storage are soldered or the manual does not list a slot |
| blowing out dust | the fan is accessible after removing the bottom cover | you would have to remove the heatsink and replace the paste and pads |
| removing the bottom cover | all screws are out and the clips release gradually | one corner remains firmly attached and you do not know why |
| replacing the battery | the battery is not swollen and is designed for separate replacement | a cell is bulging, deformed, or firmly glued in place |
| working on a gaming laptop | the manufacturer uses conventional thermal paste and pads | the cooling system uses liquid metal |
For a work laptop, also consider the impact of downtime. A damaged battery or keyboard connector can turn a planned 30-minute SSD replacement into a motherboard repair. Back up your data beforehand, not after something goes wrong — see our guide on how to back up Windows 11.
What to prepare before loosening the first screw
One small Phillips screwdriver is not enough. PC laptops may use PH0, PH00, Torx T5, and T6 screws; MacBook bottom covers use P5 pentalobe screws, while Surface devices use Torx Plus. An ill-fitting bit will strip the screw head before loosening it, turning a five-minute task into a drilling job.
Prepare:
- service instructions for your model, open on a screen beside you;
- the correct bits, fitting snugly in the screw heads;
- a plastic spudger and opening picks — a metal knife or flat-head screwdriver is not an opening tool; it concentrates force on a single clip and can short-circuit the board;
- small containers or a paper screw map traced from the underside of the laptop;
- a phone for photographing every step;
- a clean table, not a carpet; touch bare metal on the chassis before starting;
- 90% or higher isopropyl alcohol, but only if you will be cleaning electronics.
Screws may be hidden, and the cover must not be forced open
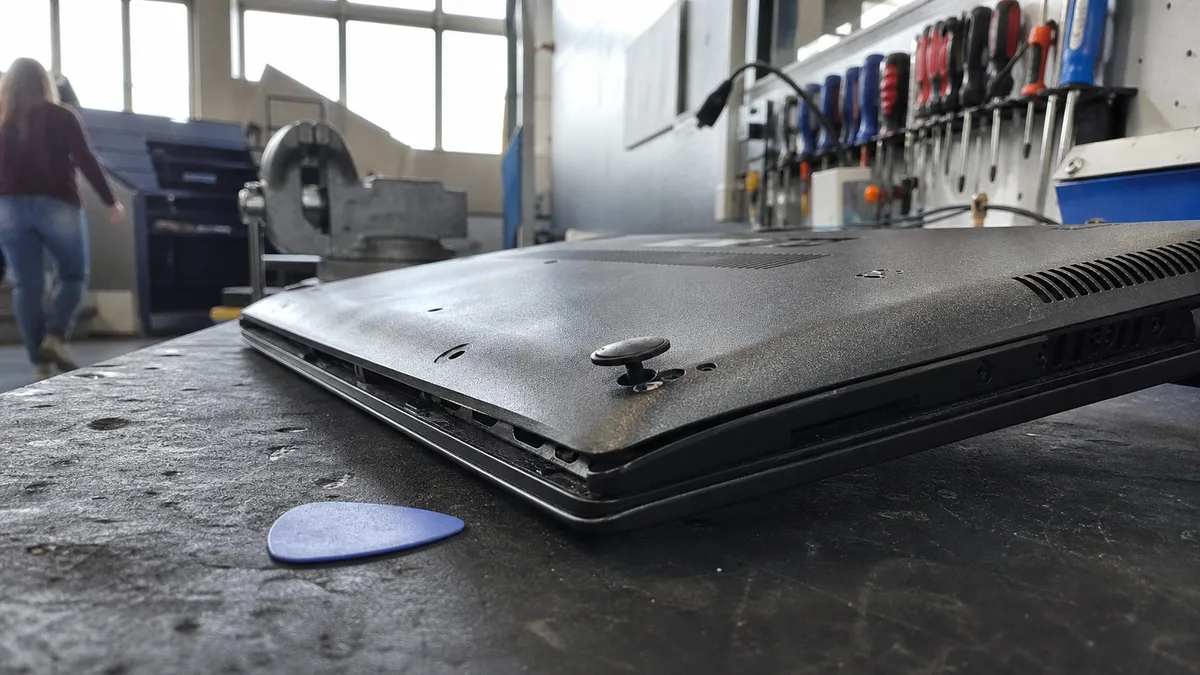
If all visible screws are out but the cover remains attached, do not apply more force. An overlooked screw is a common cause, but not the only one — the cover may also be held by a differently oriented clip, a sliding hook, an adhesive joint, or a cable connected to the bottom cover. Before applying more force, use the service instructions for your model to check all these possibilities.
Some specific examples of hidden screws: the Microsoft Surface Laptop 3 has Torx Plus screws beneath its rubber feet — the cover will not move until the feet are removed. The Dell XPS 13 9350 and 9360 have most of their Torx T5 screws around the perimeter, but one Phillips screw is hidden beneath a hinged badge in the centre of the bottom cover. Newer XPS 13 generations do not have this feature and use a different design. On older 15-inch laptops with optical drives, a screw is commonly hidden inside the bay exposed after removing the drive. Business-class HP and Dell laptops often have captive screws that stay attached to the cover instead of falling out of their holes. People may keep turning them in the belief that they are stuck, damaging the screw heads in the process.
One rule applies across the board: you cannot infer the locations of hidden screws from another model. What is concealed beneath a foot in one generation may be externally accessible in the next — and vice versa.
Rubber feet are held by adhesive that gradually softens as the laptop heats up. Remove them according to the instructions and place them adhesive-side up on a clean, non-stick surface. A worn or poorly reattached foot is not merely a cosmetic issue: it raises the chassis above the surface and creates the gap through which the laptop draws in air.
Release clips one at a time
Start at the point specified in the service instructions. Insert the plastic opening pick only deep enough to separate the edge of the cover, then move it along the perimeter. A properly released clip lets go locally — there is no need to bend the entire panel.
If a gap opens at one point but closes again a few centimetres farther along, return to the service instructions. Resistance at a single point indicates a connection you have not accounted for — a screw, a clip facing a different direction from the others, a hook, or an adhesive component. Pulling on the open corner can tear both the clip and its mating feature from the chassis, and that is not a part you can simply glue or screw back into place.
Do not lift the cover abruptly once it is loose. Some designs have a speaker or backlight cable connected to it. Raise it by only a few millimetres first and look inside.
Screws of the same colour may not be the same length
Photograph the entire underside before you start removing screws. Return every screw to its original position, not merely to a compartment labelled “bottom cover.” Two black screws with identical heads may have different lengths, and on MacBooks this applies directly to the bottom-cover screws — some are longer than the others.
A longer screw in the wrong hole can press into the motherboard or battery, or punch through the top case beside the keyboard. A shorter one may not engage the thread, leaving the cover only apparently secure. If a screw does not seat easily, do not force it — check its position.
Disconnect the battery first
Switch off the laptop, unplug the power adapter and all peripherals, and only then open it. Beware of one Windows trap: with Fast Startup enabled, the normal “Shut down” command does not fully power down the machine because the system saves its state. To shut it down completely, hold Shift while clicking Shut down.
After removing the cover, disconnect the battery first, unless the service manual specifies another safe procedure. Many ThinkPads offer a more elegant solution before the laptop is opened: press F1 to enter UEFI, then select Config → Power → Disable Built-in Battery → Yes. The built-in battery will be disabled, the laptop will switch itself off, and Lenovo service manuals instruct you to let it cool for three to five minutes. Do not transfer this procedure to another product line, however — if the option is not present in UEFI, follow the manual for your model.
There is one firm boundary: if the touchpad, keyboard, or bottom cover is lifting, the battery may be swollen. Do not press the cover back down, puncture the battery, or pry it out. Stop disassembling the laptop. Our article on a swollen laptop battery explains what to do next.
A ribbon cable is held by a lock you must identify
A ribbon cable may look as though it is simply pushed into place. It is almost always secured by a small lock, and each type releases differently. Identify the connector before touching it:
- Flip-up ZIF — lift the protruding edge of the lock with a fingernail or plastic spudger, usually to roughly a right angle. Do not push it past its stop or sideways.
- Sliding ZIF — the collar slides horizontally, parallel to the board. Prying it upward will break it.
- Cable without a lock — pull it straight out, but only after making sure there is no hard-to-see locking mechanism.
- Snap-on connector — lift beneath the connector body, not beneath the socket soldered to the board.
- Wi-Fi coaxial antenna — disconnect the tiny round connector from the card by lifting it straight upward. Pulling at an angle can tear off the socket together with its contact pad.
If the cable has a reinforced pull tab, do not pull on the thin film. During reassembly, insert it straight up to the marked line before closing the lock. A broken ZIF lock can sometimes be replaced, but using an unsecured cable in the meantime can also damage the connector’s solder joints — at that point, microsoldering is required.
Hold the fan still while cleaning
Before blowing out dust, hold each fan still separately so that its blades cannot spin. Airflow can turn a fan into a generator and send voltage back into the board; excessive speed can also damage the bearing. Do not press on the blades or wedge anything between them that could break off.
Do not use a vacuum cleaner on a laptop — it can generate static electricity, and you cannot precisely control its suction. Use 90% or higher isopropyl alcohol on electronics; weaker mixtures contain more water, dry slowly, and leave marks. Acetone and nail polish remover are not substitutes because they damage ABS and other plastics.
Once the heatsink has to come off, you are no longer merely blowing out dust but performing a service procedure: both the thermal paste and thermal pads must be replaced, and the pads must be the same thickness as the originals. Our article on thermal pads explains why this matters. Do not remove the heatsink from gaming ASUS ROG laptops that use liquid metal unless you have the proper equipment. Liquid metal is electrically conductive, and any leakage outside the designated area can cause a short circuit.
If you do not feel confident doing this part, it is exactly the kind of work we can handle — our laptop dust-cleaning service in Brno includes removing the heatsink and replacing both paste and pads. We will confirm the scope and price for your specific model in advance.
The exact moment to put down the screwdriver
Stop working as soon as any of the following applies:
- the cover remains attached at one point even after you have checked the screws, clips, and adhesive sections against the service instructions;
- you cannot identify the connector type or the direction in which it releases;
- the battery is swollen, dented, or cracked;
- you find traces of liquid or greenish corrosion;
- the heatsink uses unfamiliar pads or liquid metal;
- a screw spins freely, has a stripped head, or cannot be loosened easily;
- reaching the target component requires complete removal of the motherboard;
- no trustworthy instructions exist for your exact model.
The cost of corrective repair cannot be estimated from a single broken piece of plastic. A cracked cover clip is one kind of job, a torn-out ZIF socket another, and a damaged contact pad on the board something else entirely. When taking the laptop to a repair shop, bring all removed screws, do not snap the cover back into place, and explain the last step you performed. This can save diagnostic time and sometimes even avoid replacing a component.
How to tell whether the laptop has been reassembled correctly
The cover must sit evenly, with no new gaps or bulges. The clips should not crack under light pressure, and there must be no “extra” screws left over — a remaining screw means either that a hole is empty or that the screw has been installed in the wrong place.
Before putting the laptop back into service, run a short test: charging, keyboard, touchpad, all USB ports, Wi-Fi, sound, and fan startup. If you disconnected the antenna cables, test Wi-Fi farther away from the router, not right beside it — a poorly seated antenna may work near the router but lose the connection at the other end of the home. Unusual heat, odours, rattling, or spontaneous shutdowns are reasons to switch the laptop off again and have it inspected.
Order online: Laptop repair — tell us the model and what happens, and we will come back with the next step.
Rather not deal with it yourself?
Book a diagnosis in Brno — you get the price up front and we start only once you agree.
Where to find us
We are a PC and laptop repair shop in Brno-Židenice: diagnostics and repairs of computers and laptops, data recovery from drives, and out-of-warranty Apple repairs (iPhone 12 and newer, MacBook, iPad).
Viniční 3587/216, 615 00 Brno-Židenice, Czech Republic Mon–Fri 10:00–16:00
Call +420 774 777 774 Computer repair and laptop service in Brno
We put the repair price in writing after diagnostics and carry on only once you agree.