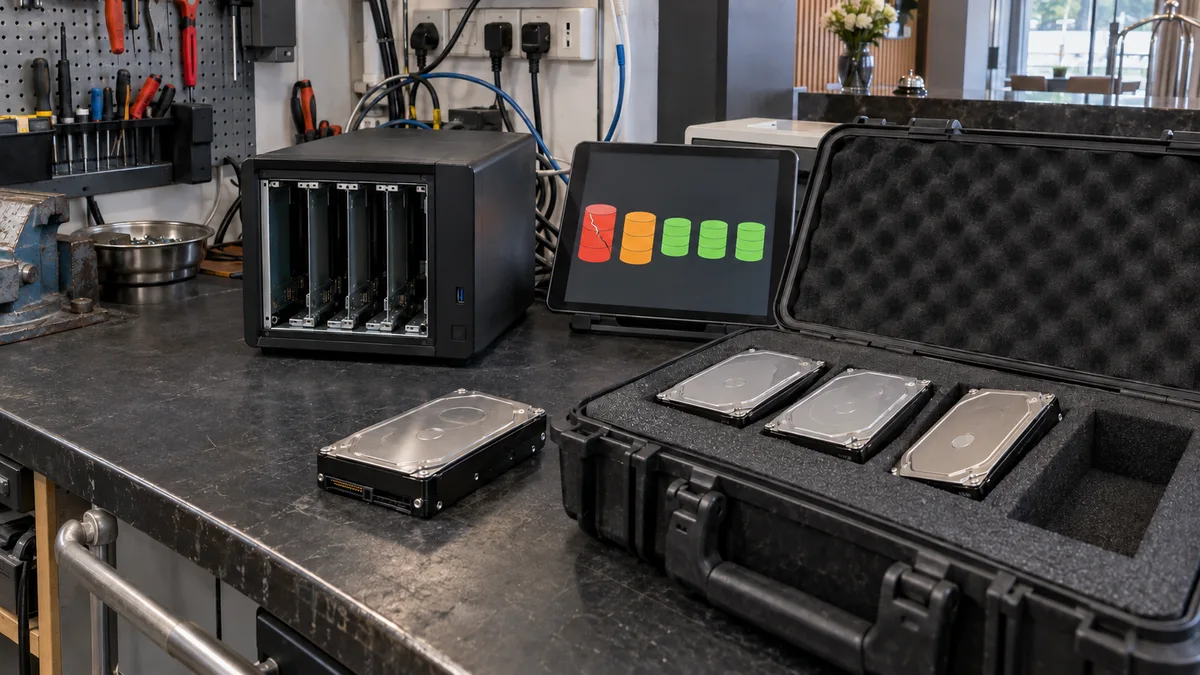
The short answer: Degraded means that the storage pool has lost some of its protection, but according to Synology it remains accessible and no data has been lost. Crashed is a different matter—Synology explicitly states that you cannot repair the pool yourself. Repair restores pool redundancy; it does not recover files from a failed volume. Record the current status and secure any accessible data first. If other drives are reporting errors, or if irreplaceable data has no backup, do not start a repair blindly.
Where to take it
A failed pool cannot be fixed with the Repair button or at an ordinary repair bench—the ITHOPE s.r.o. laboratory, which also operates Servis PC Brno, reconstructs the data from the drives: Synology NAS data recovery (ITHOPE).
SHR is not just another name for RAID 5
Synology Hybrid RAID (SHR) is an automated drive-array management system. It creates smaller arrays across drives of different sizes and combines them into a single storage pool, allowing it to use more capacity from mismatched drives than conventional RAID. That is its purpose—it does not provide a different level of protection.
DSM documentation is clear about fault tolerance: SHR-1 with a single drive can tolerate no failures, while SHR-1 with two or more drives can tolerate one. SHR-2 requires at least four drives and can tolerate two. Neither configuration is a backup.
For recovery, it is therefore essential to determine how the specific SHR configuration is actually assembled rather than treating every SHR pool as RAID 5. The broader principles across different brands are covered in the main article on RAID and NAS data recovery; this article focuses on decisions made directly in DSM.
What Storage Manager is actually reporting
Distinguish between three layers. A drive is a physical device. A storage pool groups drives together and defines their RAID configuration. A volume sits on top of the pool and contains the file system, typically Btrfs or ext4. Healthy drives therefore do not necessarily mean a healthy volume.
In DSM 7, open Storage Manager → Storage and expand the affected pool and its volumes. The names and availability of individual options vary by DSM version and NAS model.
| Status in DSM | What it means | What not to do |
|---|---|---|
| Healthy for a pool or volume | DSM is not reporting a fault at that layer. | Do not treat this as a substitute for a backup. |
| Degraded for a pool | One or more drives have failed, but the pool remains accessible and no data has been lost. | Do not remove another drive without checking the HDD/SSD page first. |
| Crashed for a pool | The pool has failed—Synology explicitly states that you cannot repair it yourself. | Do not create a new pool on the original drives. |
| Crashed for a volume | The volume has failed, whether because of its drives or its file system. | Do not confuse repairing the volume with running Repair on the pool. |
| Read-Only for a volume | The volume is accessible, but data cannot be written to it. | Do not force write access or begin by formatting it. |
Always check which object is displaying the status. A degradation warning often also appears on a volume above the affected pool, and the red warning alone identifies neither the cause nor the extent of any loss. If the NAS has simply disappeared from the network instead, look elsewhere for the cause—the article NAS cannot be found on the network explains what to check.
Three steps before you touch Repair
1. Record the status and do not move anything
Save screenshots of the storage pool, its volumes, and the HDD/SSD page. Record the NAS model, DSM version, SHR or RAID type, drive bay numbers, serial numbers, and drive capacities. Note when the first warning appeared and whether it was preceded by a drive being removed, a power outage, or an array expansion.
Do not delete logs or move drives between bays. A drive that was accidentally disconnected is not the same as a physically failed drive—and without a timeline, it is easy to exclude the wrong array member.
2. Stop unnecessary writes and copy what matters
Pause synchronisation, downloads, camera recording, and applications that write to the affected volume. If the NAS is reading reliably, first copy irreplaceable documents and photographs to a different physical storage device—not to another folder in the same pool. Then open several of the copied files to verify them.
Do not make further attempts if a drive is clicking, repeatedly disconnecting, or producing read errors. If possible, shut the NAS down properly and do not keep restarting it “just to see.” When a drive is physically damaged, creating a controlled image takes priority over browsing its files.
3. Check drive status, but do not run lengthy tests
In Storage Manager → HDD/SSD, select a drive and distinguish between its overall status, the details under Health Info, and the results of its S.M.A.R.T. tests. A quick test does not read the entire surface, while an extended test places the drive under load for much longer—and even a successful test does not confirm that every file is intact. The article how to interpret drive SMART data explains the individual values.
In a degraded array containing the only copy of your data, do not run extended tests on every drive or start Data Scrubbing as a precaution. Secure the data first; consistency checking is a tool for a healthy array, not a recovery method.
When Repair helps—and when it adds risk
DSM documentation defines the purpose of Repair precisely. It is available only for pools with data protection—RAID 1, 5, 6, 10, RAID F1, and SHR with at least two drives—and the failed drive must be replaced with a healthy one before the repair begins. The procedure is: open Storage Manager → Storage, select the pool with the Degraded status, confirm which drive has failed using the HDD/SSD page, replace it, and only then start the repair. If the NAS does not support hot-swapping, replace the drive while the device is powered off.
The replacement drive must meet the capacity requirements. For RAID 1, 5, 6, 10, and F1, it must be at least as large as the smallest drive in the pool. SHR uses a rule based on the size of the failed drive or the second-largest drive, so estimating by used capacity is not enough. Most importantly, all existing data on the replacement drive will be erased—never use a drive containing the only copy of something important.
A rebuild reads a large amount of data from the remaining drives and writes it to the replacement. With large drives, this can mean many hours of heavy load on the very media still holding the data. Once RAID 5 or SHR-1 has already lost one drive, another unrecoverable read error may prevent the affected data from being reconstructed. This does not automatically mean that everything will be lost—but it is a reason not to begin a rebuild on questionable drives before securing the data.
Then there is the limit that Synology itself makes explicit: once a pool has the Crashed status, you cannot repair it yourself. A Crashed pool, multiple failed drives, an interrupted rebuild, or an unclear replacement history should be assessed before anything else is attempted. Options such as creating a new pool, removing a drive, or initialising the array are not substitutes for a missing Repair button.
A read-only volume is not an instruction to force writes
When a volume switches to read-only mode, this is protection against further changes, not a diagnosis. The cause may lie in the drives or the file system, and the status alone does not prove that a drive has failed.
If the data remains readable, the priority is to copy it through File Station to another storage device. Only after verifying the backup does it make sense to address the cause and potentially recreate the volume. Repairing the pool is not a universal fix for its file system, and manual repair commands are not a safe shortcut—the Btrfs documentation explicitly warns against careless use of btrfs check --repair.
How many drives can fail
The table applies to an originally healthy, fully built array and assumes that the required data on the remaining drives can still be read. Failures are counted cumulatively until redundancy has been restored, not separately.
| Configuration | Minimum drives | Failure tolerance |
|---|---|---|
| SHR-1 with one drive | 1 | none |
| SHR-1 | 2 | 1 drive |
| SHR-2 | 4 | 2 drives |
| RAID 1 | 2 | 1 drive |
| RAID 5 | 3 | 1 drive |
| RAID 6 | 4 | 2 drives |
| RAID 10 | 4 (an even number) | half of the drives—but only one from each mirrored pair |
| RAID F1 | 3 | 1 drive |
RAID 10 is confusing because Synology’s table states “half of the drives.” This applies only in the best-case scenario: one drive may fail in each mirrored pair. Two failures in the same pair are a critical problem, regardless of the total number of drives.
None of these fault-tolerance levels can restore a folder that was deleted by mistake. Once the failure has been resolved, set up a separate backup as well—the 3-2-1 backup rule explains why and how.
What to prepare for the service centre and how recovery works
Ideally, bring the entire powered-off NAS with its power supply and all original drives, including those that have already been replaced. Mention any expansion unit or SSD cache, and do not exclude their drives from the handover without prior consultation.
If you are bringing only the drives, label each one with its bay number and serial number, remove them only after shutting the NAS down, and protect each drive individually against shocks. Include DSM screenshots, a description of all previous actions, the status of your backups, and a list of the most important folders. For encrypted data, prepare the keys and hand them over securely—not in an order comment.
Professional recovery does not begin with an experimental rebuild using the original drives. First, the readability of each medium is assessed and, depending on the fault, bit-for-bit images are created while unreadable areas are logged. The array layout, SHR layers, and file system are then reconstructed using working copies. Recovered files are saved elsewhere and checked. Creating copies primarily ensures that each subsequent attempt does not return to the damaged originals—but it cannot recreate missing data, and no one can promise how much will be recoverable before diagnosis.
For RAID and NAS systems, a straightforward assessment may be free, while more complex analysis is charged and the ITHOPE laboratory provides the price in advance. The cost of recovery itself depends on the fault and scope—see the data recovery price list for terms.
Frequently asked questions
Should I start Repair immediately when the status is Degraded?
First, verify your backup, use the HDD/SSD page to identify the drive that has actually failed, and check the condition of the other storage pool members. According to Synology, Repair is intended for a redundant pool after you have replaced the failed drive with a healthy one. If there are additional read errors, or irreplaceable data has no backup, arrange a diagnostic assessment first.
Does Crashed mean that all data has been lost?
No. The warning alone does not indicate how much data can be recovered. However, Synology explicitly states that you cannot repair a Crashed pool yourself—the Repair button does not apply to it. Do not create a new pool or volume on the original drives.
How many failed drives can SHR and SHR-2 tolerate?
According to the DSM RAID type table, a single-drive SHR-1 has no fault tolerance, while SHR-1 with two or more drives can tolerate one failed drive. SHR-2 requires at least four drives and can tolerate two. This protects against drive failure, not file deletion.
Can I copy files from a read-only volume?
Yes, provided the data remains readable and the drives are operating reliably. Use File Station to copy the files to a different physical storage device, then open a few of the copied files to verify them. Stop copying if you encounter read errors, drive disconnections, or clicking noises.
Is it enough to bring only the failed drive to the service centre?
No. Prepare all drives from the original pool, including any that have already been removed, and ideally bring the entire NAS. Label each drive with its bay number and include a description of all previous actions. The failed drive alone usually does not contain everything required to reconstruct the array.
Servis PC Brno does not perform data recovery. The ITHOPE s.r.o. laboratory, which operates Servis PC Brno, will assess the condition of the Synology system and its individual drives and recommend the next steps: Synology NAS data recovery, or, for arrays in general, RAID array data recovery. For urgent cases, call 775 556 063—24/7.
Sources
- Synology DSM 7 — Repair a Storage Pool
- Synology DSM 7 — Choose a RAID Type
- Synology — What is Synology Hybrid RAID (SHR)?
- Synology DSM 7 — Storage Overview
- Synology DSM 7 — HDD/SSD
- Synology DSM 7 — Data Scrubbing
- Synology DSM 7 — Replace a Drive
- Btrfs documentation — btrfs-check(8)
- CGSecurity — Damaged Hard Disk
Rather not deal with it yourself?
Book a diagnosis in Brno — you get the price up front and we start only once you agree.
Where to find us
We are a PC and laptop repair shop in Brno-Židenice: diagnostics and repairs of computers and laptops, data recovery from drives, and out-of-warranty Apple repairs (iPhone 12 and newer, MacBook, iPad).
Viniční 3587/216, 615 00 Brno-Židenice, Czech Republic Mon–Fri 10:00–16:00
Call +420 774 777 774 Computer repair and laptop service in Brno
We put the repair price in writing after diagnostics and carry on only once you agree.