The short answer: When a Dell will not start and the battery LED (or, on some models, the power-button LED) blinks amber and white, it is reporting a specific fault from Dell’s diagnostic table. The number of amber flashes is the first digit of the code, and the number of white flashes is the second: 2 amber and 7 white flashes produce code 2,7, which indicates a display failure, most commonly an improperly connected or damaged panel cable. Codes 2,3 and 2,4 indicate memory problems that you can check at home by reseating the module; 2,1, 2,2, 2,6, 2,8, 3,2, and 3,5 through 3,7 require professional repair. To start diagnostics, press F12 at the Dell logo and select Diagnostics.
Don’t want to deal with it yourself? Bring your laptop to our repair shop in Brno
You can find us at Viniční 3587/216 in Brno-Židenice, Mon–Fri from 10:00 a.m. to 4:00 p.m. We will diagnose the fault and quote the repair price in advance. Diagnostics cost CZK 600 only if you subsequently decide not to proceed with the repair—when we perform the repair, diagnostics are included in the job (price list).
How Dell LED codes flash and how to count them
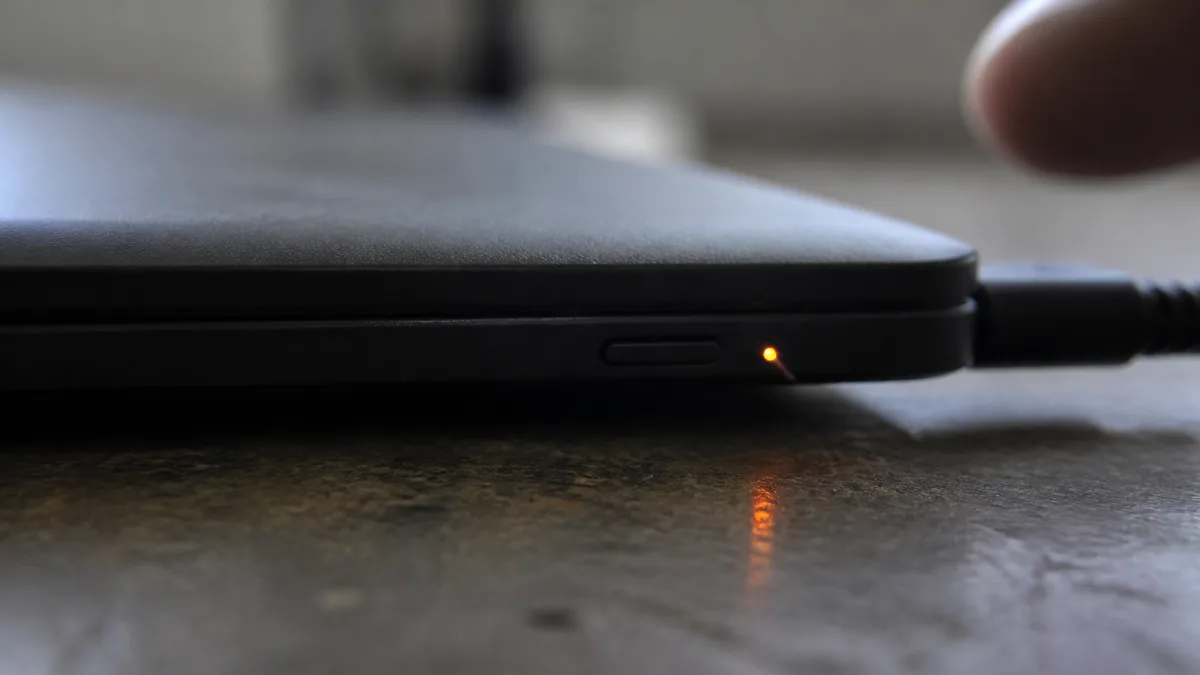
Latitude, Inspiron, Vostro, XPS, and Precision models all use the same system: the LED flashes amber as many times as the first digit, turns off for 1.5 seconds, flashes white as many times as the second digit, and repeats after 3 seconds. On most models, the battery-status LED flashes; on some Precision models, it is the power-button LED.
- Record it on your phone. Seven or eight white flashes are easy to miscount; a video lets you determine the code reliably.
- Alternating colors without a count are not a diagnostic code. According to Dell, regular alternation between amber and white indicates an unsupported or non-Dell AC adapter. An amber LED flashing alongside a steady white LED indicates a temporary battery failure, while continuous amber flashing indicates a critical battery failure; see laptop not charging or holding a charge.
- Read the code with the AC adapter connected. Both the RTC reset and the M-BIST test described below require it.
Dell code table: amber × white
Source: the Dell knowledge base (the Latitude article was updated on August 18, 2026) and the Latitude 5540 manual; the exact list for your model is available in its manual under “System-diagnostic lights.”
| Code (amber, white) | Dell’s diagnosis | What to try at home | Repair |
|---|---|---|---|
| 1,1 / 1,2 | TPM chip not detected / SPI flash failure | RTC reset | motherboard |
| 1,6 | internal EC controller failure | drain residual power | if it recurs |
| 2,1 | processor | RTC reset | motherboard |
| 2,2 | motherboard: corrupted BIOS or ROM | nothing | motherboard |
| 2,3 | no memory detected | reseat the module | if it persists |
| 2,4 | memory failure | test modules individually and swap slots | module or slot |
| 2,5 | unsupported memory | reinstall the original modules | if it persists |
| 2,6 | motherboard or chipset | nothing | motherboard |
| 2,7 | display; panel cable may not be connected properly | external monitor, LCD BIST | cable, panel, motherboard |
| 2,8 | display power rail on the motherboard | external monitor to access your data | motherboard |
| 3,1 | RTC/CMOS battery | RTC reset | battery, motherboard |
| 3,2 | PCI or graphics | nothing | motherboard |
| 3,3 / 3,4 / 3,6 / 3,7 | BIOS recovery: recovery image not found / invalid / flash corruption / ME error | BIOS recovery following Dell’s instructions | if unsuccessful |
| 3,5 | power-rail failure (EC) | disconnect everything, reset RTC | motherboard |
| 4,1 / 4,2 | memory-module / processor power failure | swap slots / nothing | if it persists |
What 2 amber and 7 white flashes mean
Code 2,7 has the same meaning across all five product lines: LCD failure. The Latitude 5540 manual specifies that with code 2,7, the display cable may not be connected properly, whereas 2,8 indicates a failure of the display power rail on the motherboard. Both are reported by the automatic L-BIST performed at every startup, and with code 2,8 the LCD BIST color test cannot be started. For you, this is the difference between replacing a cable or panel and replacing the motherboard. Dell’s community wiki, written by a Dell moderator, lists a faulty panel, a loose or damaged eDP cable, and, less commonly, the motherboard’s display circuitry as possible causes of code 2,7. Follow these steps:
- Connect an external monitor over HDMI or USB-C. If it displays an image, the motherboard and graphics system are functioning, and the likely cause is the panel or cable.
- Run the LCD BIST. With the laptop off, hold D and press the power button until colors appear. The panel cycles through black, white, red, green, and blue; press Esc to exit. Lines, dots, flickering, and dark areas indicate a panel fault. Clean colors point to the cable, connector, or motherboard.
- Inspect the laptop. A code that appeared after a fall or hinge repair points to the cable; lines, blotches, and visible cracks point to the panel. See cracked or flickering laptop display.
Reseating an eDP cable requires disassembling the display lid; we do not recommend attempting this at home on models with glued bezels.
Older Dell laptops: three status lights or beep codes
Latitude E-series models encoded faults using combinations of the drive, battery, and Wi-Fi indicators. A flashing drive light with steady battery and Wi-Fi lights indicated a possible processor failure, while all three lights flashing indicated a motherboard fault. Inspiron models from 2006 through 2016 used beep codes for diagnostics. Dell documents these separately: 1 = BIOS or ROM, 2 = no memory detected, 4 = memory failure, 5 = CMOS battery, 6 = graphics, 7 = processor, and 8 = LCD.
How to run F12 diagnostics step by step
The built-in diagnostics—formerly ePSA and now called SupportAssist Pre-boot System Assessment—test hardware without the operating system, but they require a working display. If the screen remains black, use the code table and the M-BIST test instead.
- At the Dell logo, press F12 repeatedly until the One Time Boot Menu appears.
- Select Diagnostics. A quick test starts; the mouse and touchscreen will not work. Dell estimates that the memory test takes 10 to 15 minutes.
- To test a single device or use the comprehensive mode, press Esc and select Advanced Test. Thorough mode takes longer but can detect more faults. The display test requires your response; otherwise, it ends with error code 2000-0333, “user did not provide input.”
- The result will either be “All tests passed” or an error code in the 2000-0NNN, 2000-4NNN, or 2000-8NNN range, together with a validation code. For example, 2000-0123 indicates a memory failure, with reseating the modules as the first step; 2000-0142 indicates that the drive self-test failed.
- Write down the error code, validation code, and Service Tag, or photograph the QR code. Dell’s results submission form requires exactly these three details: the error code without the 2000 prefix, the validation code, and the Service Tag.
If there is no display output, use M-BIST: with the laptop off, hold M and press the power button. An unlit LED means the motherboard is working; an amber LED indicates a problem, after which it flashes a specific code for 30 seconds. The Latitude 5540 manual lists codes 1,1, 2,1, 2,4, and 2,8. If there is no fault, the panel cycles through solid colors for 30 seconds. Dell lists this test for Latitude models from the xx90 generation onward.
What you can safely try at home
For general checks involving the AC adapter, wall outlet, and peripherals, see laptop won’t turn on. The steps below are specific to Dell laptops.
- Drain residual power. On models with a removable battery, Dell recommends removing it, disconnecting the AC adapter, and holding the power button for 15 to 20 seconds. Dell lists this as the first step for code 1,6.
- Reset the RTC on models with an internal battery. On selected models with 8th-generation Intel processors or newer, turn the laptop off, leave the AC adapter connected, hold the power button for 30 to 35 seconds, and release it when the power LED flashes three times. Holding the button for less than 25 seconds or more than 40 seconds, or disconnecting the adapter, cancels the reset. This restores the BIOS factory defaults and clears the date and time. The Service Tag, passwords, and TPM state remain unchanged, but Dell warns that the computer may not boot until you set the date and time again. On models without a coin-cell battery, the main battery powers the clock—the Precision 3561 reserves 2% of its capacity for this—so perform the reset with a charged battery.
- Check the memory for codes 2,3, 2,4, 2,5, and 4,1. Disconnect the AC adapter and test the modules one at a time in both slots. Dell uses this procedure to determine whether the fault follows the module or stays with the slot; a faulty slot means a motherboard problem. Code 2,5 after an upgrade indicates an unsupported module, so reinstall the original one. If the memory is soldered, take the laptop straight to a repair shop.
- BitLocker. Neither an RTC reset nor BIOS recovery alters your data, but Dell warns that BIOS recovery may prompt you for the recovery key. Have your BitLocker recovery key ready.
What not to do
- Do not flash the BIOS blindly. Codes 3,3, 3,4, 3,6, and 3,7 are related to BIOS recovery. Dell provides a dedicated procedure requiring the correct file for your exact model, a connected AC adapter, and a battery charged to at least 25%. Dell does not recommend BIOS recovery after a fall or liquid damage.
- Do not disassemble or solder the motherboard. Codes 2,1, 2,2, 2,6, 2,8, 3,2, 3,5 through 3,7, and 4,2 cannot be repaired at home. See faulty motherboard for ways to isolate a motherboard fault without soldering.
- Do not hold the power button “as long as possible.” The RTC reset has a 25-to-40-second window; holding it longer cancels the reset.
When professional repair is needed
- the code persists with a single known-good memory module, or the memory is soldered;
- codes 2,1, 2,2, 2,6, 3,2, 3,5 through 3,7, 4,2, and 1,x codes involving the motherboard, BIOS, graphics, or power rails;
- code 2,7 when the LCD BIST runs cleanly but the panel displays no image, indicating the eDP cable, and code 2,8, indicating the motherboard;
- codes 3,3, 3,4, and 3,6 when BIOS recovery fails; Dell’s own procedure then calls for motherboard replacement.
If the laptop is under warranty, submit a claim to the retailer or Dell and include the LED code and diagnostic result. Outside the warranty period, we will assess whether repairing the motherboard makes more sense than replacing it.
How to identify your Dell: Service Tag
Every Dell has a Service Tag, a seven-character alphanumeric code engraved on the bottom cover or printed on a label, and an Express Service Code, which is the same identifier converted into digits. If the label has worn off, you can find the tag in the BIOS: press F2 during startup and locate Service Tag under Overview or System Information. The tag identifies the exact model, warranty status, and correct BIOS file for recovery.
Be aware of the product names: since January 2025, Dell has marketed laptops under the Dell, Dell Pro, and Dell Pro Max brands, and in January 2026 it brought back the XPS brand with the XPS 14 and 16, followed by the XPS 13 later in 2026. This does not affect the diagnostic codes; Dell’s Latitude code article also lists Dell Plus, Dell Pro, and Dell Pro Max among the affected products.
What to bring to the repair shop
Bring the laptop with its original AC adapter, the Service Tag—a photo of the label is sufficient—a video of the flashing LED or a written copy of the code, and details of what happened beforehand, such as a BIOS update, memory replacement, fall, or liquid spill. If you ran F12 diagnostics, include the error code and validation code; for an encrypted drive, bring the BitLocker recovery key. We will read the code on-site and determine whether the cable, memory, or motherboard is at fault. Diagnostics without a subsequent repair cost approximately CZK 600 according to the price list; when we perform the repair, diagnostics are not charged separately. Arrange an appointment through the booking form or call 774 777 774; see laptop repair in Brno for an overview of our services.
Frequently asked questions
My Dell blinks 2× amber and 7× white. Is it the display or the motherboard?
According to Dell, this indicates an LCD failure; the Latitude 5540 manual adds that the display cable may not be connected properly. An external monitor and the LCD BIST—hold D while turning the laptop on—will help identify the cause: clean colors indicate the cable or connector, while lines and dark areas indicate the panel. Code 2,8 indicates a display power-rail failure on the motherboard.
My Dell blinks 2× amber and 3× or 4× white. Is replacing the memory enough?
2,3 means no memory was detected, while 2,4 indicates a memory failure. Before buying a new module, test the existing modules one at a time in both slots. If the fault remains with one slot, the motherboard is at fault. Soldered memory requires professional repair.
Can I run F12 diagnostics without a display?
No. The F12 menu requires a working display, so try an external monitor. Without display output, use the LED code and M-BIST—hold M while turning the laptop on. An unlit LED means the motherboard is working; an amber LED indicates a problem.
Will an RTC reset or BIOS recovery erase my data?
No. An RTC reset restores the BIOS factory defaults and clears the date and time; the Service Tag, passwords, and TPM state remain unchanged. Dell’s BIOS recovery process does not alter your data or Windows, but it may require your BitLocker recovery key.
Sources
- Dell KB 000131044 (Latitude)
- Dell KB 000140521 (Inspiron)
- Dell KB 000141346 (Vostro)
- Dell KB 000141206 (XPS)
- Dell KB 000135030 (Precision)
- Latitude 5540: System-diagnostic lights
- Latitude 5540: L-BIST
- Latitude 5540: M-BIST
- Dell KB 000181163 (F12 diagnostics)
- Dell KB 000181167 (2000-0NNN codes)
- Dell: Pre-Boot System Performance Check
- Dell KB 000134936 (LCD BIST)
- Dell KB 000125880 (RTC reset)
- Precision 3561: RTC reset
- Dell KB 000125609 (No Power / No POST)
- Dell KB 000126066 (memory)
- Dell KB 000132453 (BIOS recovery)
- Dell KB 000132041 (beep codes)
- Dell: Locate Your Laptop’s Service Tag
- Dell Community (DELL-FAQ): 2 Amber, 7 White
- Dell newsroom January 6, 2025
- Dell newsroom January 6, 2026: XPS Returns
Rather not deal with it yourself?
Book a diagnosis in Brno — you get the price up front and we start only once you agree.
Where to find us
We are a PC and laptop repair shop in Brno-Židenice: diagnostics and repairs of computers and laptops, data recovery from drives, and out-of-warranty Apple repairs (iPhone 12 and newer, MacBook, iPad).
Viniční 3587/216, 615 00 Brno-Židenice, Czech Republic Mon–Fri 10:00–16:00
Call +420 774 777 774 Computer repair and laptop service in Brno
We put the repair price in writing after diagnostics and carry on only once you agree.